Gel nail set with lamp: a captivating journey into the world of exquisite manicures. From the delicate application of builder gels to the vibrant hues of color gels, this guide explores the artistry and science behind this popular beauty treatment.
Understanding the crucial role of UV/LED lamps, the varied components, and the meticulous application process are key to achieving flawless results. This guide delves into each aspect, providing detailed explanations and helpful insights.
Introduction to Gel Nail Sets with Lamps
Gel nail sets offer a way to enhance and maintain the appearance of natural nails. They provide a long-lasting, polished finish, making them popular for both everyday wear and special occasions. This method is a common practice, often used for both aesthetic and practical reasons.Gel nail sets involve the application of a specialized gel over the natural nail, providing a durable, glossy, and aesthetically pleasing finish.
The process relies on UV/LED lamps to cure the gel, hardening it into a strong, protective layer. The application and curing process are relatively straightforward and can be performed by trained professionals or at home with appropriate guidance.
Overview of Gel Nail Sets
Gel nail sets consist of various components, each playing a crucial role in the process. These components include base coats, color gels, and top coats. Base coats are applied first to the natural nail, providing a protective layer and adhering the gel. Color gels come in a wide array of shades and finishes, allowing for customization to suit personal preferences.
Top coats, applied over the color gel, provide a glossy finish, enhance shine, and protect the nail from damage. Builder gels are used to add thickness and length to the nails, offering an additional layer of structural support.
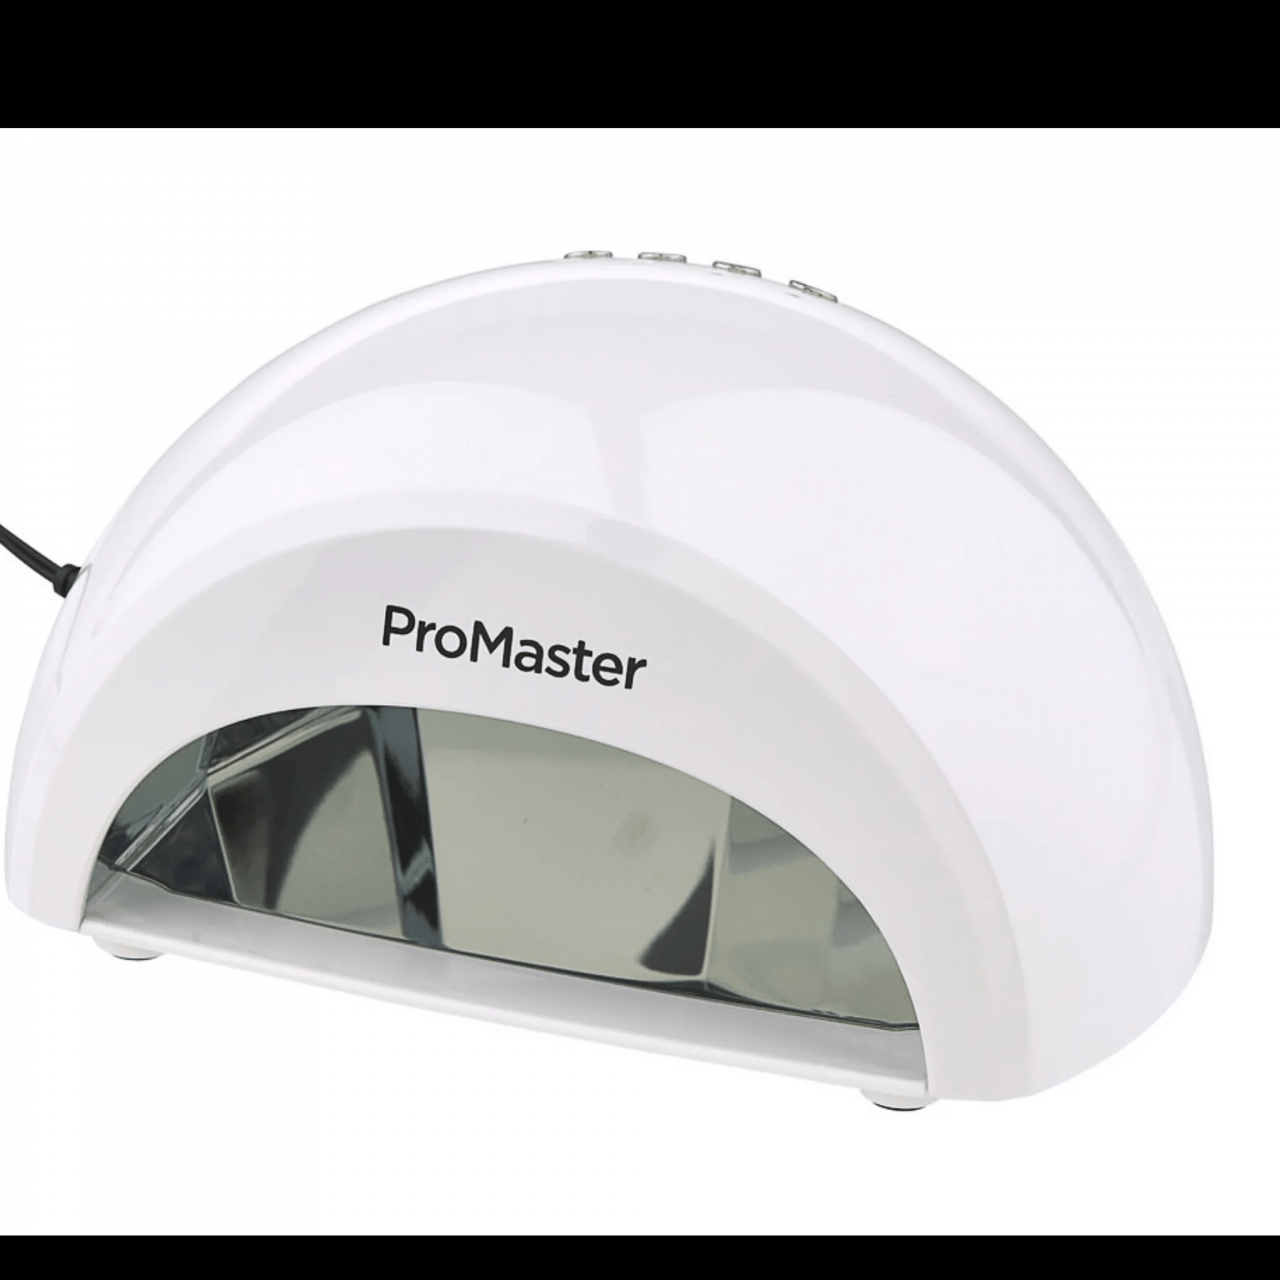
UV/LED Lamps in the Gel Nail Process, Gel nail set with lamp
UV/LED lamps are essential in the gel nail application process. These lamps use ultraviolet (UV) or light-emitting diode (LED) light to cure the gel, hardening it into a durable and protective layer. The curing time varies depending on the type of lamp and gel used. This curing process is critical to ensure the gel’s adhesion and longevity.
Types of Gel Nail Sets
Gel nail sets encompass a variety of products, catering to diverse needs and preferences. The different types of gels are designed for specific purposes, such as building, coloring, and protecting the nails. Understanding these types allows individuals to choose the right products for their needs.
- Base Coats: These form a protective layer beneath the color gel, enhancing adhesion and longevity.
- Color Gels: These provide the desired color and finish, ranging from natural shades to vibrant hues.
- Top Coats: These provide a glossy finish, enhance shine, and protect the nail from damage.
- Builder Gels: These add thickness and length to the natural nail, offering structural support.
Comparison of Lamp Types
Different types of lamps offer varying advantages in terms of speed, cost, and energy efficiency. Understanding these differences helps users select the appropriate lamp for their needs.
| Lamp Type | Features | Speed (curing time) | Cost |
|---|---|---|---|
| UV Lamp | Uses ultraviolet light to cure gel. | Generally slower curing time compared to LED. | Generally lower initial cost compared to LED. |
| LED Lamp | Uses light-emitting diodes to cure gel. | Faster curing time compared to UV. | Generally higher initial cost compared to UV. |
| Hybrid Lamp | Combines UV and LED light sources. | Offers a balance between speed and cost. | Mid-range cost compared to UV and LED. |
Gel Nail Set Components: Gel Nail Set With Lamp
Understanding the components of a gel nail set is crucial for a successful and safe manicure. Each tool plays a specific role, from prepping the nails to curing the gel, ensuring a professional and long-lasting result. Correct use of these components is essential for achieving the desired aesthetic and protecting the natural nail.
Essential Components
Understanding the components and their functions is paramount for a successful and safe manicure. A well-organized set allows for efficient and precise application, leading to a professional finish and protecting the natural nail.
| Item | Description | Function |
|---|---|---|
| Nail File | A tool with abrasive surfaces for shaping and smoothing the natural nail. | Prepares the nail bed for gel application, ensuring a smooth surface for adhesion. |
| Buffer | A fine-grit abrasive tool for polishing the nail. | Creates a smooth and even surface for the gel to adhere to, improving the final look. |
| Cuticle Pusher/Remover | A tool for pushing back or removing the cuticle. | Prepares the cuticle area for gel application, preventing product from accumulating under the nail and improving the overall look. |
| Nail Cleanser/Degreaser | A solution to remove oils and residues from the nail plate. | Ensures optimal adhesion of the gel to the nail, promoting longevity and a better manicure result. |
| Base Coat | A thin layer of gel applied before the color gel. | Protects the natural nail and creates a smooth surface for the color gel. |
| Color Gel | Gel in various colors for adding aesthetics. | Provides color and aesthetic enhancement to the nail. |
| Top Coat | A transparent gel applied over the color gel. | Protects the color gel, enhances shine, and gives a protective layer to the nail. |
UV/LED Lamps
Choosing the right UV/LED lamp is crucial for proper gel curing. The type of lamp directly impacts the curing process, and selecting the appropriate lamp is vital for the longevity and quality of the manicure.
UV and LED lamps use different technologies to cure gel, affecting the time and energy required. The most common types are UV, LED, and hybrid UV/LED lamps. Different gel types have varying curing times under each lamp type.
UV lamps use ultraviolet light to cure gel, while LED lamps use light-emitting diodes. Hybrid lamps combine both technologies. UV lamps typically require longer curing times compared to LED lamps.
- UV Lamps: These lamps are generally less expensive than LED lamps, but require longer curing times. They can also be less energy-efficient. Examples include 36-watt lamps used for standard UV gels. A common issue with UV lamps is their potential to cause some degree of heat on the nails.
- LED Lamps: These lamps offer faster curing times and greater energy efficiency than UV lamps. They also produce less heat. Examples include 48-watt LED lamps used for fast-curing gels. LED lamps are generally considered better for the client, as they cause less heat than UV lamps, which is good for the client’s overall comfort.
- Hybrid UV/LED Lamps: These lamps combine UV and LED technologies, often offering the benefits of both faster curing times and a wider range of gel compatibility. Examples include 36/48-watt hybrid lamps, allowing for curing different gel types.
Selecting the right lamp type is crucial for ensuring proper curing and gel longevity. Consider the type of gel being used and the desired curing time when making your choice.
Application Procedures
Applying gel nails requires meticulous attention to detail and precise application techniques. Each step, from preparing the natural nail to curing the final layer, plays a crucial role in achieving a long-lasting and aesthetically pleasing result. Understanding these procedures ensures the safety and well-being of the natural nail bed and the longevity of the gel manicure.
Preparing the Natural Nails
Proper preparation of the natural nails is essential for a successful gel nail application. This involves removing any existing polish and ensuring the nail surface is clean, smooth, and free of debris. This step directly impacts the adhesion of the gel to the nail plate. The preparation process must not damage the natural nail.
- Remove any existing polish using an appropriate nail polish remover. Acetone-based removers are often recommended, but caution should be exercised to avoid prolonged exposure, which can weaken the natural nail.
- Push back cuticles to expose the natural nail bed and avoid any interference during application.
- File the natural nails to a desired shape and length, ensuring a smooth and even surface. This is crucial for even application and prevents chipping or breakage.
- Clean the nails thoroughly with a nail brush and an appropriate cleanser to remove any dust or residue. This ensures a clean surface for the primer to adhere to.
Applying the Primer
Applying a bonding agent or primer is crucial to promote adhesion between the natural nail and the gel. It creates a stronger bond, preventing lifting and ensuring the gel nail application lasts longer.
- Apply a thin, even coat of primer to the prepared nail surface, ensuring all areas are covered.
- Cure the primer in the UV/LED lamp for the recommended time (typically 60 seconds for LED, and 120 seconds for UV). This step is critical to the bonding process. Improper curing will reduce the effectiveness of the primer.
Applying the Base Coat
The base coat acts as a protective layer and a smooth surface for the gel color.
Looking for a way to elevate your self-care routine? A gel nail set with lamp is a fantastic choice, offering long-lasting, chic manicures. Thinking about financial stability? Consider the resources available at Prairie Community Bank Marengo IL for your banking needs. Ultimately, pampering yourself with a gel nail set with lamp is a fantastic way to invest in your well-being, and remember to prioritize your self-care journey.
- Apply a thin, even coat of base coat to the natural nail, covering the entire surface.
- Cure the base coat in the UV/LED lamp for the recommended time (typically 60 seconds for LED, and 120 seconds for UV). This step ensures the base coat sets properly and creates a uniform surface for color application.
Applying the Color Gel
The color gel is the layer that provides the desired aesthetic.
- Apply a thin, even coat of color gel to the nail, covering the entire surface. The consistency of the color gel is crucial for smooth application.
- Cure the color gel in the UV/LED lamp for the recommended time (typically 60 seconds for LED, and 120 seconds for UV). Ensure each layer is cured appropriately to prevent lifting or chipping.
- Repeat the application of the color gel if necessary for opacity or even coverage.
Applying Top Coat
The top coat is the final layer and provides protection, shine, and durability.
- Apply a thin, even coat of top coat to the nail surface.
- Cure the top coat in the UV/LED lamp for the recommended time (typically 60 seconds for LED, and 120 seconds for UV). This step is crucial for the longevity of the manicure.
Curing Time Table
| Step | Gel Type | LED Curing Time (seconds) | UV Curing Time (seconds) |
|---|---|---|---|
| Primer | Primer | 60 | 120 |
| Base Coat | Base Coat | 60 | 120 |
| Color Gel | Color Gel | 60 | 120 |
| Top Coat | Top Coat | 60 | 120 |
Proper curing time is crucial for each layer to achieve the desired results and ensure longevity.
Maintenance and Removal
Maintaining gel nails involves consistent care to preserve their integrity and longevity. Proper maintenance, including regular cleaning and moisturizing, significantly impacts the health of the natural nail bed and the overall appearance of the gel manicure. Removal, when necessary, should be performed safely and effectively to prevent damage to the natural nails. Understanding both maintenance and removal techniques empowers one to enjoy a beautiful and healthy manicure.
Proper Maintenance Techniques
Regular maintenance is crucial for maintaining the health of both the gel nails and the natural nails underneath. Regular cleaning helps prevent dirt and debris buildup, which can contribute to bacterial growth and potential infection. Moisturizing the natural nail bed is essential to keep it hydrated and healthy. This can help prevent dryness and cracking, which can negatively affect the longevity of the gel manicure.
Consistent care minimizes the risk of damage to the natural nails. Use cuticle oil to keep cuticles moisturized and healthy.
Gel Nail Removal Methods
Gel nail removal methods vary in their efficacy and potential impact on the natural nails. Selecting the appropriate method depends on the type of gel used, the length of time the gel has been applied, and the individual’s nail health. Careful consideration of the chosen method minimizes the risk of damaging the natural nails.
Removal Method Comparison
| Removal Method | Pros | Cons |
|---|---|---|
| Acetone Soak | Relatively inexpensive, widely available, and often effective for most gel types. | Can weaken natural nails if not performed correctly, and can cause irritation if the nails are sensitive. May require multiple soakings. |
| File and Soak | Often a more controlled removal process than a full soak, potentially less damaging to the natural nail. | Can be time-consuming, may require multiple sessions, and not as effective on thicker or highly pigmented gels. |
| Gel Remover | Specialized gel removers often designed to minimize damage to natural nails and promote nail health. Usually a more effective and faster process. | More expensive than acetone, and may not be effective on all gel types. |
| Professional Removal | Professionals have expertise in using appropriate tools and techniques, minimizing damage to the natural nail. Usually a more precise and effective process. | Most expensive option. Requires a visit to a salon. |
Potential Problems and Solutions
Gel nail application and maintenance can sometimes lead to issues. For example, if the gel is not applied correctly, it may not adhere properly, leading to lifting or chipping. If the natural nails are not adequately moisturized, they may become dry, brittle, or prone to splitting, which can impact the overall appearance and durability of the gel manicure.
A nail technician’s expertise can resolve many of these issues, ensuring proper application and maintenance procedures.
Level up your mani game with a gel nail set and lamp—it’s a self-care treat that lasts! But, if your contractor messes up the job and damages your property, you might wonder if does homeowners insurance cover damage caused by a contractor will help. Knowing your insurance coverage is key, so you can focus on your fabulous gel nails without stressing about hidden costs.
After all, a flawless manicure deserves peace of mind!
Troubleshooting and Common Issues
Troubleshooting gel nail applications is crucial for achieving satisfactory results and maintaining client satisfaction. Understanding the potential problems and their solutions is essential for a skilled nail technician. This section details common issues and their remedies, emphasizing the importance of proper technique and product compatibility.
Common Gel Nail Application Issues
Understanding the potential problems encountered during gel nail application is vital for a smooth and successful process. Improper application techniques, incompatibility of products, and environmental factors can all lead to issues. Recognizing these issues and knowing how to rectify them is key to providing exceptional services.
- Lifting or Separation of Gel: Gel can lift or separate from the natural nail due to improper adhesion. Insufficient preparation of the natural nail, inadequate bonding of the primer, or insufficient curing of the base coat are common culprits. Correcting this issue involves ensuring thorough preparation of the nail plate, employing a quality primer and bonding agent, and ensuring adequate curing times for each layer.
- Gel Not Curing Properly: Insufficient curing time or improper use of the UV/LED lamp can lead to incomplete curing. This can result in weak nails, premature chipping, and an uneven finish. Ensuring the lamp is functioning correctly, maintaining a consistent curing time for each layer, and maintaining the recommended distance from the lamp are essential steps to resolve this issue.
- Gel Bubbles: Bubbles in the gel application can be a result of improper mixing or application technique. If bubbles form, they can disrupt the nail’s aesthetic appeal and compromise the integrity of the gel layer. Careful mixing of the gel, precise application techniques, and using a thin, even layer are important steps in preventing bubbles.
- Gel Not Adhering to the Nail: This can be caused by insufficient cleaning or dehydration of the natural nail. A lack of proper preparation of the natural nail before application can lead to weak adhesion. Thoroughly cleaning the nail bed, using a proper bonding agent, and ensuring proper curing time can solve this problem.
Common Gel Nail Removal Issues
Addressing gel nail removal effectively requires understanding the process and potential pitfalls. Improper removal techniques can damage the natural nail. Identifying the causes of these issues is crucial to prevent harm to the client.
- Nail Damage During Removal: Aggressive removal methods, such as using harsh chemicals or improper tools, can damage the natural nail plate, causing splitting, breakage, or thinning. Using gentle removal methods, like soaking the nails in a specific solution, and avoiding excessive force when removing the product can minimize this issue.
- Gel Remaining on the Nail: Incomplete removal of the gel can lead to a messy or incomplete look. This can result from inadequate soaking time or using an unsuitable removal solution. Ensuring adequate soaking time, using the correct removal solution, and using the proper tools will resolve this issue.
- Irritation or Redness of the Nail Bed: This can arise from the use of harsh or incompatible products. Allergic reactions to certain ingredients are also possible. Using a suitable and gentle product, ensuring product compatibility, and checking for any allergic reactions will prevent this issue.
Troubleshooting Table
| Problem | Possible Causes | Solutions |
|---|---|---|
| Gel lifting | Insufficient nail preparation, inadequate bonding, improper curing | Thorough nail preparation, using a quality primer and bonding agent, ensuring adequate curing times |
| Gel not curing properly | Incorrect lamp settings, insufficient curing time, improper technique | Adjust lamp settings, ensuring consistent curing time, using correct application techniques |
| Bubbles in gel | Improper mixing, uneven application, inadequate drying time | Proper mixing, even application, and maintaining appropriate drying time |
| Gel not adhering to the nail | Insufficient cleaning, lack of dehydration, inappropriate primer | Thorough nail cleaning, using a proper bonding agent, and using a compatible primer |
| Nail damage during removal | Harsh chemicals, improper tools, excessive force | Gentle removal methods, appropriate tools, avoiding excessive force |
| Gel remaining on the nail | Inadequate soaking time, unsuitable removal solution | Sufficient soaking time, using appropriate removal solution |
| Nail bed irritation | Harsh products, incompatibility, allergic reactions | Using gentle and suitable products, checking for allergic reactions |
Tips and Tricks for Professional Results
Achieving professional-looking gel nails requires precision, attention to detail, and a good understanding of the application process. This section provides expert tips and tricks to elevate your gel nail application from amateur to expert-level. These techniques will ensure a beautiful and long-lasting result, reflecting a commitment to quality craftsmanship.Understanding the importance of meticulousness and attention to detail is crucial in this field.
Small errors in application can significantly impact the overall aesthetic and longevity of the gel manicure. This section will delve into techniques to minimize these errors and achieve flawless results.
Precision and Attention to Detail
Maintaining precision throughout the entire application process is paramount. This involves precise nail shaping, accurate application of gel layers, and careful control of the curing process in the UV/LED lamp. Accurate application minimizes the risk of imperfections and ensures a smooth, professional finish. Each step should be approached with meticulous care, ensuring a flawless result.
Tips for Creating Various Nail Designs
Several factors contribute to the creation of intricate nail designs. Proper preparation of the nail plate is critical for adhesion and longevity of the design. Understanding the specific tools and techniques required for each design is also important.
- For intricate nail art, meticulous application of thin layers of gel is crucial. Precise placement of the design elements, using fine brushes or stencils, is vital for detailed designs.
- Use of stencils and specialized nail art tools can assist in achieving complex designs. Experimenting with various nail art techniques and designs will expand your skillset and creativity.
- Practice applying various designs to different nail shapes and lengths to develop proficiency. Experimenting with different gel colors, textures, and patterns will enhance your creativity.
Nail Art Techniques and Required Tools
The following table summarizes different nail art techniques and their corresponding tools.
| Nail Art Technique | Description | Essential Tools |
|---|---|---|
| French Manicure | A classic nail design featuring a white tip on a natural or colored nail bed. | White gel, cuticle pusher, nail file, buffer, base coat, top coat |
| Gradient Nail Art | A technique involving a smooth transition of colors from light to dark or vice versa. | Various gel colors, mixing tools, thin brushes, nail art pen, base coat, top coat |
| Glitter Nail Art | Incorporating glitter into the gel nail design. | Glitter, thin brushes, base coat, top coat, glue for rhinestones (optional) |
| 3D Nail Art | Incorporating 3D elements, like crystals or small figurines. | Gel colors, glue, 3D nail art elements, thin brushes, base coat, top coat |
Different Nail Art Designs Using Gel Nail Sets

Gel nail art offers a wide array of creative possibilities, allowing for personalization and self-expression. This section explores various nail art designs achievable with gel nail sets, outlining techniques and tools for each style. Understanding these techniques enhances the artistry and precision of the application process.Gel nail art allows for intricate designs, from simple embellishments to complex patterns, making it a versatile choice for various aesthetics.
The application of gel nail art requires precision and practice, but the results are visually appealing and long-lasting.
Types of Nail Art Designs
Different nail art designs can be achieved using gel nail sets. These designs range from simple, elegant styles to intricate, elaborate ones. The techniques and tools used vary depending on the chosen design.
French Manicure
The classic French manicure remains a popular choice, offering a sophisticated and elegant look. This style involves painting the tips of the nails a contrasting color, often white, against a natural or colored base. A simple white tip on a natural nail bed, or a delicate design on the tip, adds subtle beauty. The tools include brushes, nail polish (in white or other colors), and a top coat.
Abstract Designs
Abstract designs provide a platform for creativity and experimentation. Various techniques, such as blending colors, creating marbled effects, or applying decals, can be used to achieve unique abstract patterns. This style allows for a wider range of color combinations and textures, allowing the user to express their personality through visual creativity. The tools include brushes, different colored gels, stencils (for precise shapes), and blending tools for smooth transitions.
Geometric Designs
Geometric nail art incorporates shapes and lines to create visually appealing patterns. This style allows for intricate patterns and precise designs. The use of stencils, brushes, and different colored gels are key to achieving a flawless look. Precise lines and angles are crucial for a geometric design. Tools include stencils, brushes, and various colored gels.
Floral Designs
Floral nail art is a romantic and feminine style. A variety of techniques can be used to create delicate floral patterns, such as using stencils, dotting tools, or applying small beads or rhinestones to resemble flowers. This style emphasizes attention to detail and can range from simple flower designs to intricate bouquets. Tools include stencils, brushes, dotting tools, nail art pens, and small embellishments (like beads or rhinestones).
Metallic and Shimmering Designs
Metallic and shimmering nail art offers a glamorous and sophisticated look. These designs incorporate metallic or shimmering gels, allowing for various levels of shine and intensity. The application involves careful layering of the metallic or shimmery gel, or incorporating glitter for a unique aesthetic. The tools include brushes, metallic or shimmery gels, and glitter.
Gradient Designs
Gradient nail art involves a smooth transition between two or more colors, creating a visually appealing ombre effect. Different shades and colors can be blended using a gradient technique to achieve a captivating effect. Tools include brushes, different colored gels, and blending tools for seamless transitions.
Comparison of Different Gel Nail Sets
Understanding the nuances of various gel nail sets is crucial for achieving desired results and maintaining high-quality manicures. Different brands and manufacturers employ varying formulations and technologies, impacting application, durability, and removal procedures. This section delves into the characteristics of several popular gel nail sets, providing a comparative analysis to guide informed choices.
Gel Nail Set Brand Comparisons
Various brands offer gel nail sets, each with its own set of features and benefits. Comparing these sets helps understand the strengths and weaknesses of each, leading to informed decisions based on individual needs and preferences. This comparative analysis focuses on key aspects like application ease, durability, and removal methods.
| Brand | Features | Application | Durability | Removal |
|---|---|---|---|---|
| Brand A | Known for its quick-drying formula and easy application, often with a smooth texture. | Generally straightforward; minimal bubbles or clumping. | Typically provides moderate durability; suitable for everyday wear. | Removal is relatively easy, with minimal damage to the natural nail. |
| Brand B | Often features a high-shine finish and a thicker consistency, which can improve durability. | May require a bit more practice due to its thicker consistency. | Known for its exceptional durability; suitable for extended wear, even with frequent activities. | Removal can be slightly more challenging due to the thickness. Professional removal is often recommended. |
| Brand C | Offers a wide range of colors and finishes, appealing to a diverse customer base. Formulations are often designed to be easily cured. | Provides a smooth application experience; minimal effort for a high-quality manicure. | Offers excellent durability, lasting for a significant period. | Removal is generally smooth and safe. |
Application Procedures and Differences
Different gel nail sets may have varying application procedures. Understanding these differences is essential for achieving optimal results and preventing common issues.
- Brand A often utilizes a thinner consistency, making application quicker and more user-friendly. The formula is designed to reduce the risk of bubbles and ensure a smooth application.
- Brand B, with its thicker consistency, might require more meticulous application to prevent unevenness. Careful attention to detail and precise brush strokes are key to a flawless application.
- Brand C is known for its ease of application, offering a consistent and smooth texture that ensures minimal effort in achieving a high-quality manicure. The product formulation is designed to minimize the risk of clumping and bubbles.
Durability and Longevity
Durability is a key factor in choosing a gel nail set. The longevity of a manicure depends on the product’s resistance to chipping, cracking, and peeling.
- Brand A generally provides moderate durability, suitable for everyday wear. However, activities involving significant impact or prolonged exposure to harsh environments may cause chipping or cracking.
- Brand B excels in providing excellent durability, withstanding even frequent activities and exposure to harsh environments. The formulation and thickness contribute to its longevity.
- Brand C offers excellent durability, withstanding everyday wear and tear. The quality of the product allows for long-lasting manicures.
Removal Processes and Considerations
Gel nail removal methods can vary depending on the specific gel set. Understanding the removal process is crucial to minimize damage to the natural nail.
- Brand A usually features a simpler removal process, often involving a soak-off solution. This generally causes less damage to the natural nail.
- Brand B may require a more thorough removal process due to its thicker consistency. Professional removal is sometimes recommended for optimal results and to avoid damaging the natural nail.
- Brand C typically involves a relatively smooth removal process. The formulation is designed for safe and efficient removal.
Final Conclusion
In conclusion, mastering the art of gel nails involves a comprehensive understanding of the entire process, from preparation to maintenance. This guide has offered a detailed exploration of gel nail sets with lamps, equipping you with the knowledge to achieve professional-looking results. With practice and attention to detail, you can unlock a world of beauty and self-expression through this captivating craft.
FAQ Resource
What are the different types of UV/LED lamps?
Different lamp types include UV, LED, and hybrid lamps. UV lamps use ultraviolet light to cure gels, while LED lamps use light-emitting diodes. Hybrid lamps combine both UV and LED technologies.
What are the common problems in applying gel nails?
Common issues include improper curing, incompatibility of gels, and uneven application. These problems often stem from incorrect use of lamps, poor nail prep, or improper gel application.
How long should I cure each layer of gel?
Curing time varies depending on the gel type and lamp used. Refer to the instructions provided with the gel and lamp for specific curing times.
What are some tips for achieving professional-looking results?
Achieving professional results involves meticulous application, attention to detail, and the correct use of tools and techniques. Practice and patience are essential.
